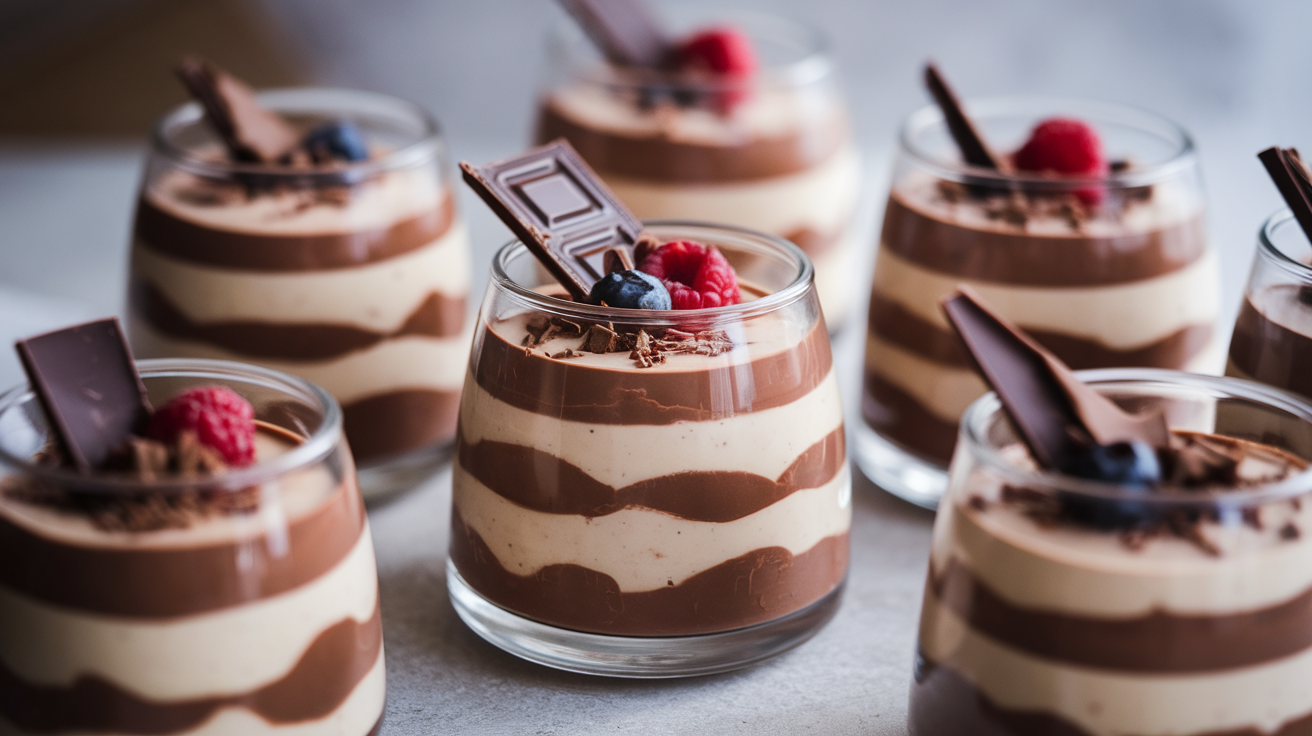
Layered Chocolate Pudding Cups
Alright, let’s talk about Layered Chocolate Pudding Cups—because sometimes, dessert needs to be fun, indulgent, and perfectly portioned. Think creamy chocolate pudding, crunchy cookie layers, whipped cream clouds, and maybe a little chocolate drizzle to make it look like you actually tried. Spoiler: minimal effort, maximum wow factor.
These cups are perfect for parties, weeknight treats, or whenever life feels like it needs more chocolate in a cup.
Why This Recipe Is Awesome
First, layers = instant fancy vibes. Stack pudding, cookies, and cream, and suddenly you’re the dessert hero.
Second, it’s super customizable. Chocolate chips, crushed cookies, caramel drizzle—you name it.
Third, everyone loves individual servings. No cutting, no plates, no awkward “how much do I get?” questions.
And finally, it’s fast and forgiving. Even if your layers aren’t perfect, the flavors still win.
Ingredients You’ll Need
- Chocolate pudding (3–4 cups, prepared) – Homemade or instant works
- Whipped cream or whipped topping (2 cups) – Light and fluffy
- Chocolate sandwich cookies (10–12, crushed) – Adds texture and crunch
- Chocolate syrup or shavings – For topping
- Optional extras: mini chocolate chips, caramel drizzle, crushed nuts
Bold tip: Use a clear glass or cup so those layers show off their full glory. Presentation counts.
Step-by-Step Instructions
- Prepare pudding.
Make pudding according to package instructions or your favorite homemade recipe. Let it cool slightly. - Crush the cookies.
Coarse crumbs are perfect—don’t pulverize. You want texture, not dust. - Assemble the first layer.
Spoon a layer of chocolate pudding into each cup. Smooth lightly with a spoon. - Add cookie layer.
Sprinkle crushed cookies over the pudding. Press lightly to even it out. - Add whipped cream.
Spoon or pipe a layer of whipped cream over the cookies. Smooth gently. - Repeat layers.
Add pudding, then cookies, then whipped cream again. End with whipped cream on top. - Decorate.
Drizzle chocolate syrup or sprinkle chocolate shavings over the top. Add mini chocolate chips if you want extra flair. - Chill before serving.
Refrigerate for at least 1–2 hours so layers set and flavors meld.
Common Mistakes to Avoid
- Skipping chill time. Warm pudding = messy layers.
- Over-crushing cookies. Texture is key—don’t make cookie dust.
- Filling cups too full. Leave space for topping and drizzling.
- Using warm pudding. It can melt your whipped cream.
- Neglecting presentation. Clear cups = instant wow.
Alternatives & Substitutions
- Use different cookies: Oreos, gingersnaps, or shortbread all work.
- Swap flavors: Peanut butter or caramel pudding for variety.
- Add fruit: Strawberries, raspberries, or banana slices for contrast.
- Make mini versions: Perfect for bite-sized party servings.
- Add crunch: Toasted nuts or granola can elevate the texture.
Personal opinion: chocolate + caramel drizzle is basically magic.
FAQ (Frequently Asked Questions)
Can I make these ahead of time?
Yes! Make a few hours in advance or even the night before—they actually taste better after chilling.
How long do they last?
Up to 2–3 days in the fridge. After that, textures change.
Do I have to use whipped cream?
You can skip it, but it adds lightness and contrast.
Can I make them dairy-free?
Yes! Use dairy-free pudding and whipped topping.
What if my layers mix together?
No worries—it’ll still taste amazing, just less photogenic.
Can kids help assemble?
Absolutely. They’ll love layering and drizzling chocolate.
Final Thoughts
Layered Chocolate Pudding Cups are proof that dessert can be indulgent, customizable, and super easy all at once. The layers make them look fancy, but they’re basically a no-fail treat for any occasion.
Assemble, chill, and watch everyone swoon over your dessert skills—no oven or stress required.