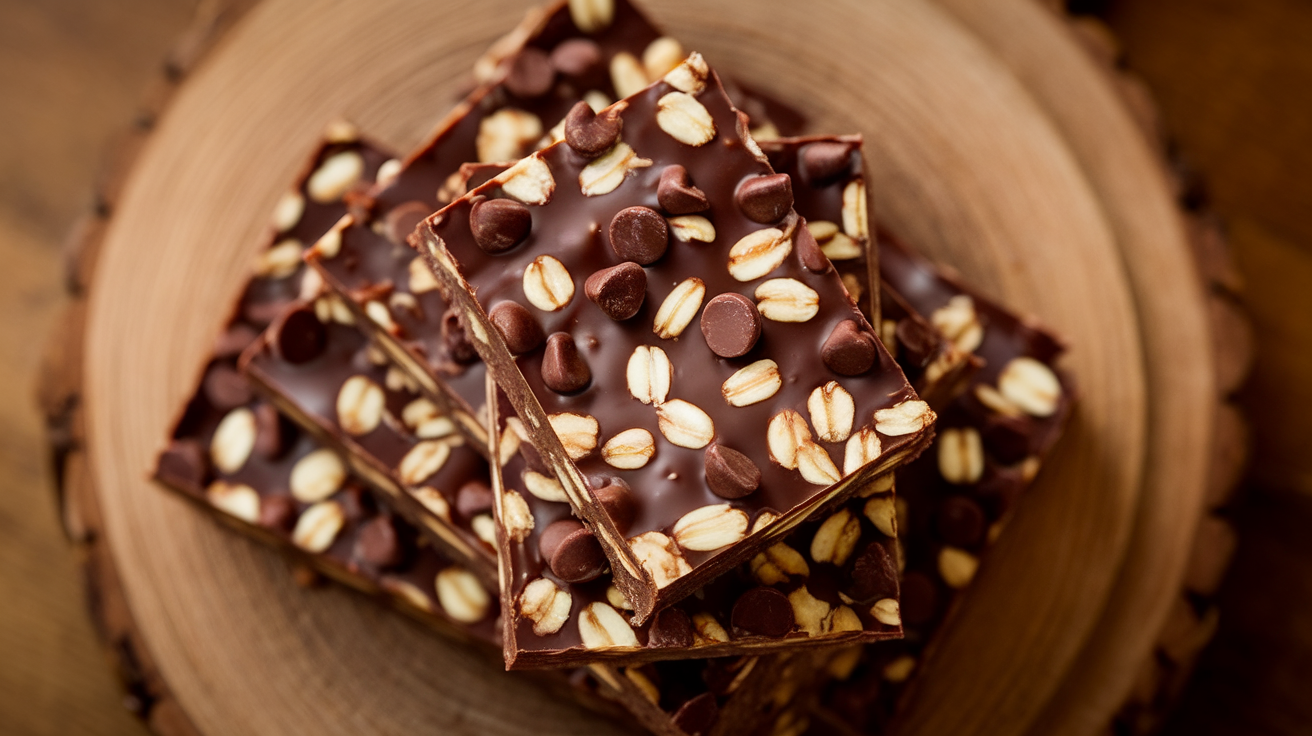
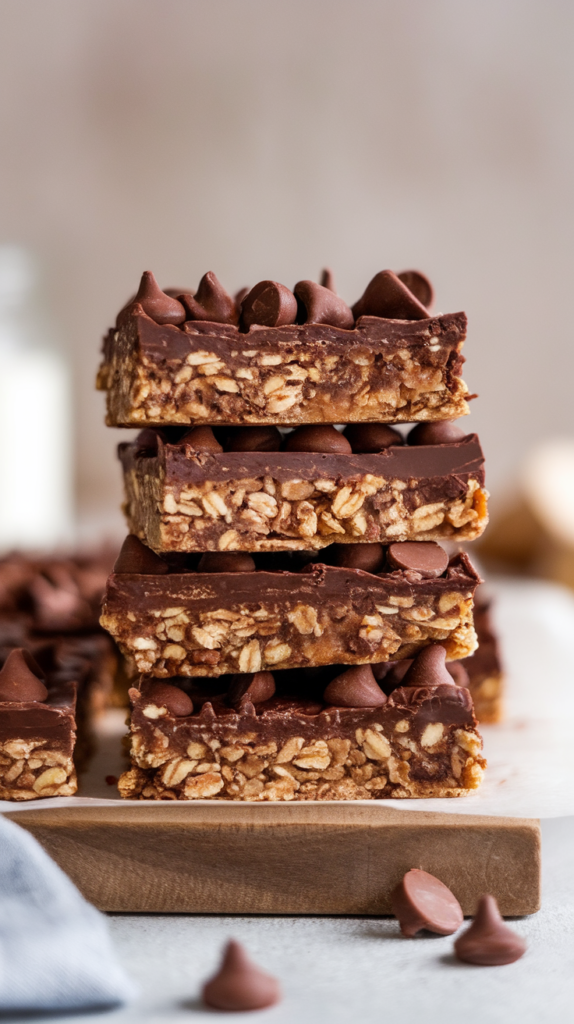
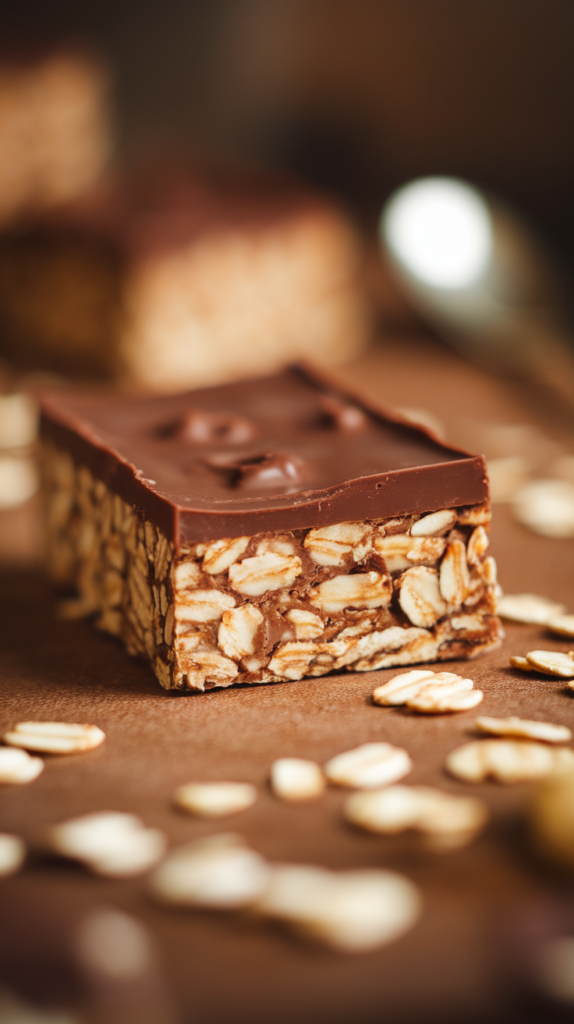
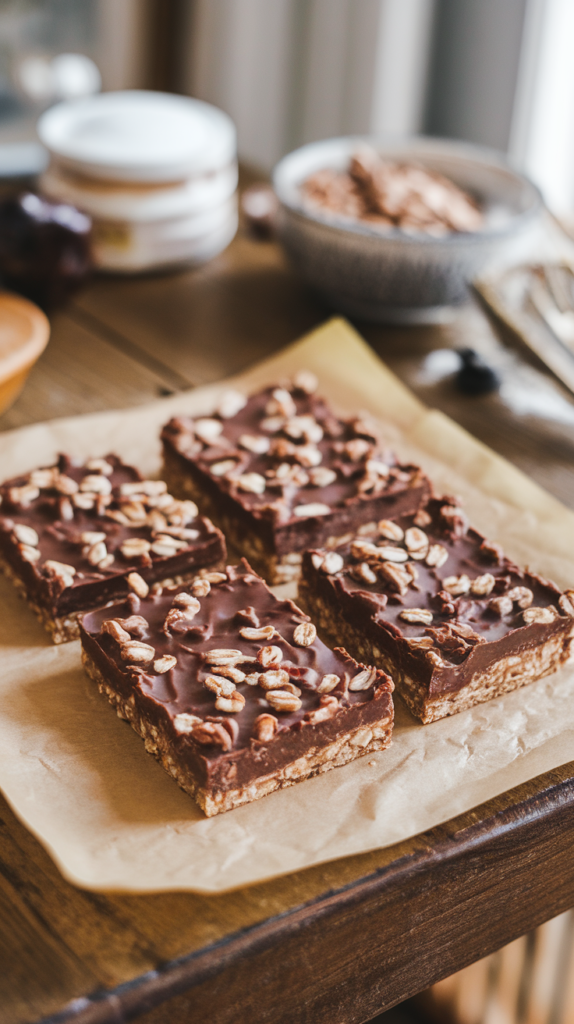
Low-Calorie Chocolate Oat Bars
So you want something chocolatey. But not cake chocolatey. More like “snack that won’t make me question my life choices” chocolatey. Same.
These Low-Calorie Chocolate Oat Bars hit that sweet spot—rich cocoa flavor, chewy oat texture, and just enough sweetness to feel like a treat without going overboard.
They’re perfect for grab-and-go snacking, late-night cravings, or that 4 p.m. slump when your willpower mysteriously disappears.
Why This Recipe Is Awesome
Let’s get into it:
- Low-calorie and filling. Oats = fiber = satisfaction.
- Chocolatey without being a sugar bomb. Cocoa does the heavy lifting.
- Easy to make. No fancy tools, no drama.
- Great for meal prep. Make once, snack all week.
- Customizable. Add-ins welcome, chaos controlled.
Basically, these bars understand your snack needs.
Ingredients You’ll Need
Nothing complicated. Promise.
Dry Ingredients
- 1½ cups rolled oats – Old-fashioned works best.
- ¼ cup unsweetened cocoa powder – Go for good-quality if you can.
- ¼ tsp salt – Chocolate’s best friend.
Wet Ingredients
- ¼ cup honey or maple syrup – Just enough sweetness.
- ¼ cup unsweetened applesauce – Moisture without extra calories.
- ¼ cup milk of choice – Almond, skim, oat, whatever you like.
- 1 tsp vanilla extract – Makes it taste like dessert.
Optional but excellent:
- 2 tbsp dark chocolate chips – Because life.
- 1 tbsp nut butter – Adds richness (still low-cal if you’re gentle).
Key tip: Measure cocoa carefully. Too much and things get bitter fast.
Step-by-Step Instructions
- Preheat oven to 350°F (175°C).
Line a small baking dish with parchment paper. - Mix the dry ingredients.
Combine oats, cocoa powder, and salt in a bowl. Stir well. - Mix the wet ingredients.
In another bowl, whisk honey (or maple syrup), applesauce, milk, and vanilla. - Combine wet and dry.
Pour wet ingredients into dry and mix until everything is evenly coated. - Add optional extras.
Fold in chocolate chips or nut butter if using. - Press into baking dish.
Spread evenly and press down firmly. This helps the bars hold together. - Bake for 15–18 minutes.
Edges should look set, but the center will still be soft. - Cool completely before slicing.
This part matters. Warm bars = crumbly chaos.
Common Mistakes to Avoid
- Overbaking.
These bars firm up as they cool. Take them out early. - Not pressing the mixture firmly.
Loose pressing = bars that fall apart. - Using instant oats.
Texture turns mushy. Rolled oats are the move. - Skipping parchment paper.
Trust me. Don’t. - Expecting them to taste like brownies.
They’re oat bars, not fudge. Adjust expectations.
Alternatives & Substitutions
Make them yours.
- Gluten-free:
Use certified gluten-free oats. - Vegan:
Use maple syrup and plant-based milk. - Higher protein:
Add 1–2 tbsp chocolate protein powder. FYI, add a splash more milk. - Extra crunch:
Add chopped almonds or walnuts. - No bake option:
Chill in the fridge for 1–2 hours instead of baking (texture will be softer).
IMO, keeping them simple lets the chocolate flavor shine.
FAQ (Because You’re Thinking About It)
Are these actually low-calorie?
Yes. Each bar usually lands around 120–140 calories, depending on size.
Can I store them for later?
Absolutely. Keep in an airtight container for up to 5 days.
Can I freeze them?
Yes. Freeze up to 2 months. Thaw at room temp before eating.
Why are my bars dry?
Too much cocoa or overbaking. Both are easy to fix next time.
Can I add bananas instead of applesauce?
You can, but flavor changes. Banana will dominate.
Are these kid-friendly?
Definitely. Chocolate + oats = instant approval.
Final Thoughts
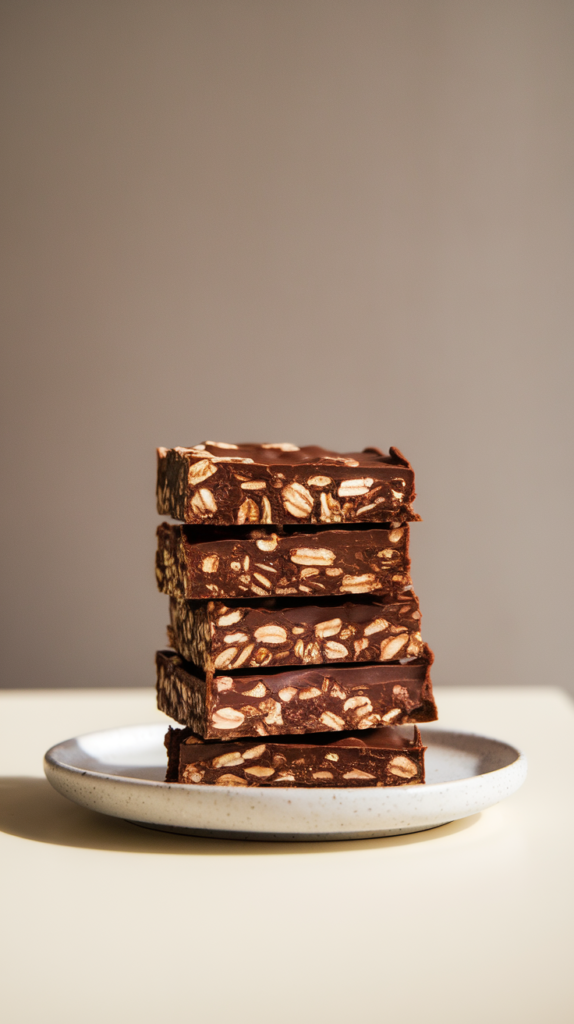
These Low-Calorie Chocolate Oat Bars are chewy, chocolatey, and perfect for when you want a treat that doesn’t feel like a mistake. They’re easy to make, easy to customize, and even easier to snack on.
Bake them once. Cut them up. Hide a few for yourself.
You’ve officially upgraded your snack game.